Warehouse
Purposes
The main purpose of this module is to enable the administrator to view and manage the warehouses on the system. The warehouse may belong to the type of External/Internal (or) both. The main purpose of the warehouses is to store the consumable products of the companies.
Navigation Path
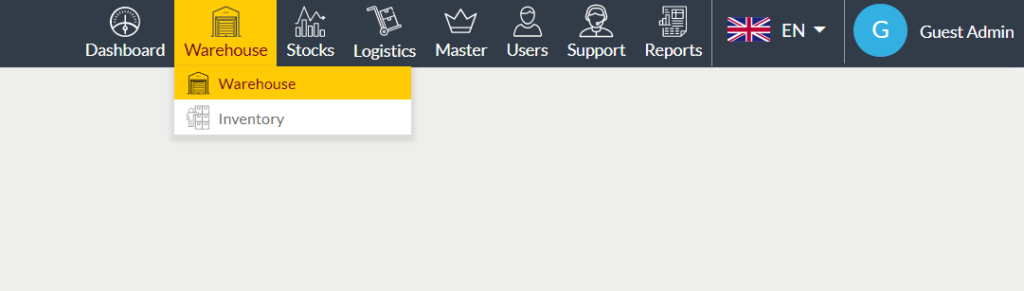
Path: Warehouse> Warehouse
Listing Screen
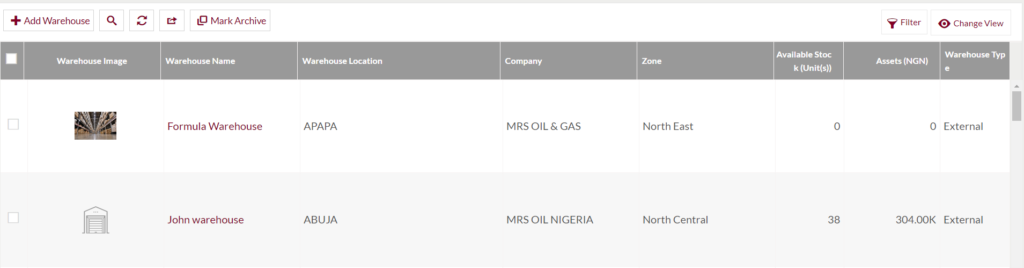
View list of all the warehouses that are previously added by the admin. Admin will have an option to add, update and archive/unarchive the warehouses. Admin will be able to search the warehouses using the text search filter option this is provided in the list. Admin can view the listing in two ways(Grid/Table), the admin will have the option to change the view by clicking on “Change view” Button.
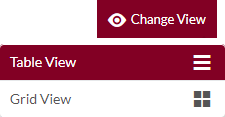
Table view
Grid view
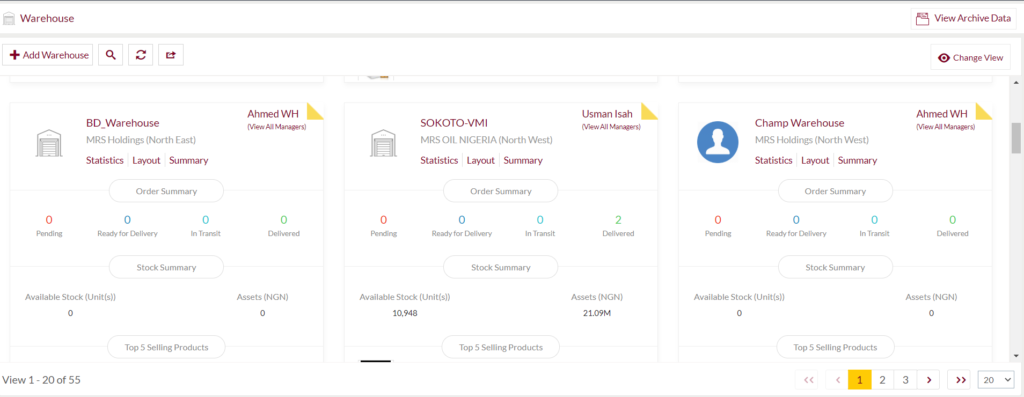
- In the grid view, the admin will be able to view the count of pending, ready to delivery, in transit, and delivered order’s count of the particular warehouse. On click, the user will be navigated to the respective order count page. By clicking on the “View All Managers” option provided at the top right, the user will be able to view the particular warehouse managers list. The available stock, top-selling products, and the assets of the warehouse will also be displayed here.
- Users will be able to view the warehouse statistics, layout, and summary. On clicking the summary option, the warehouse summary will be displayed as shown below
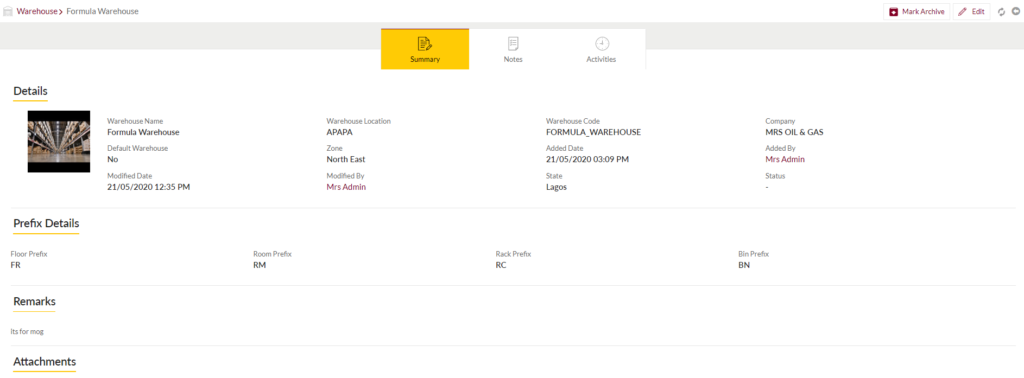
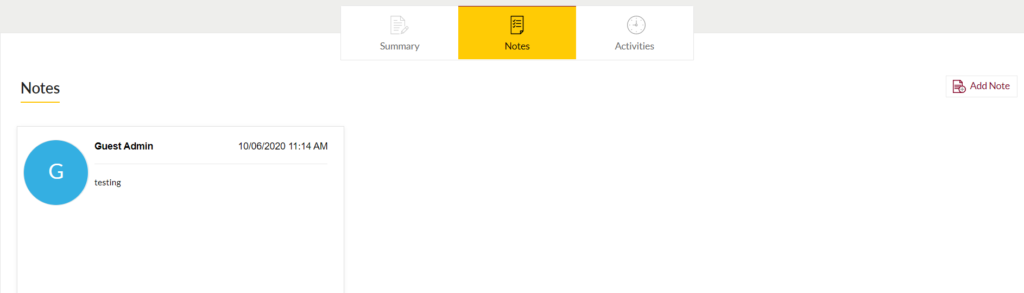
- View Notes: Admin will be able to view and add the notes for the warehouse.
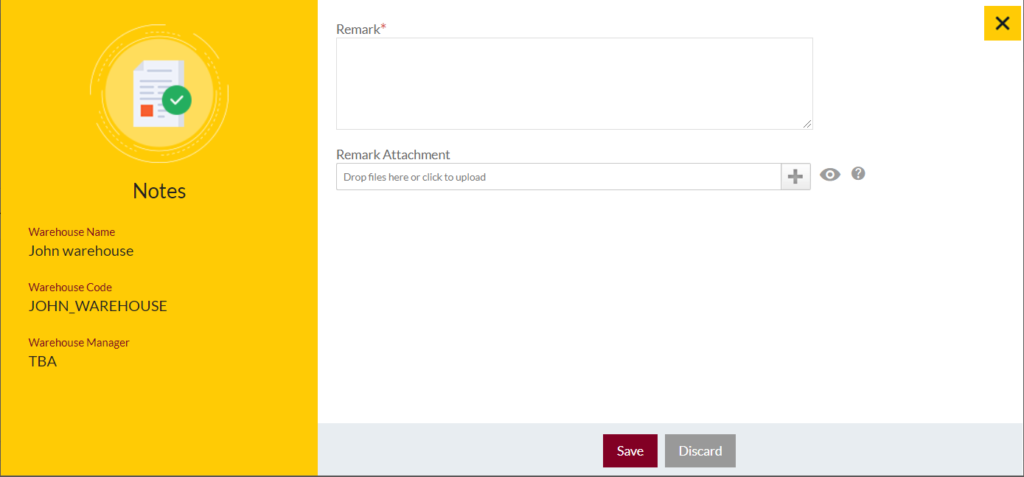
- Add Notes: Notes can be added by adding “Remark” and uploading remark Documents.
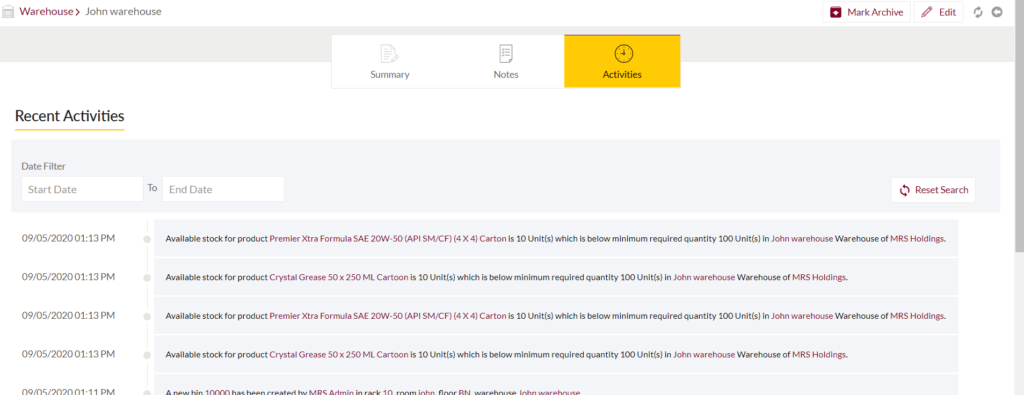
- View Activities: By clicking on the “Activities” tab, the user will be able to view the warehouse activities.
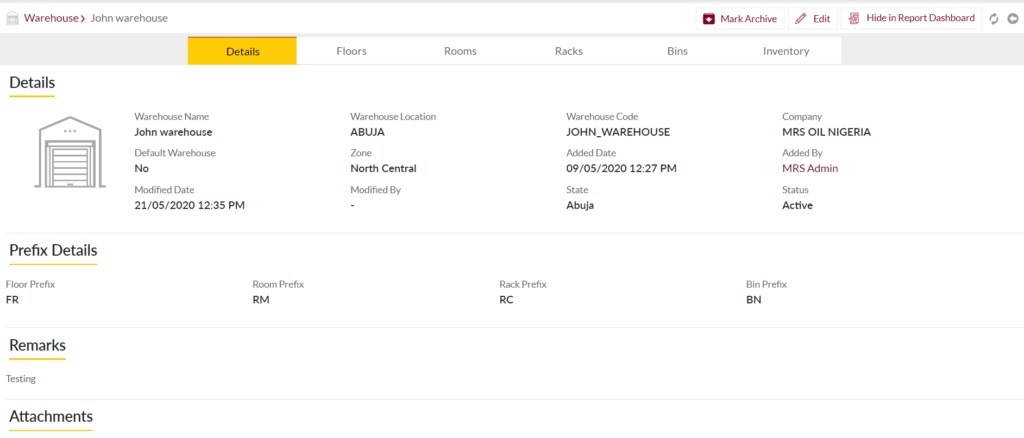
View Warehouse Details: On clicking the warehouse name available in the listing, the admin will be able to view the details of the warehouse.
- Add/View Floors: On clicking the Floors tab, the user will be able to view and add floors to the warehouse for storing the consumable products, as shown in the below
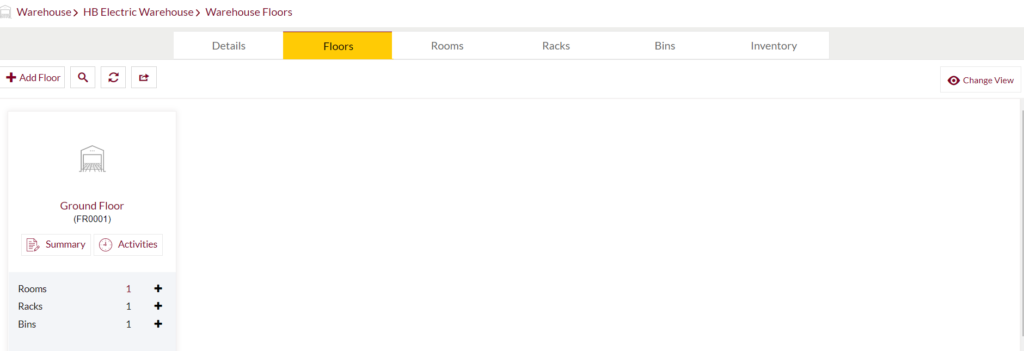
By clicking, the “Add Floor” button, the user will be able to add a new floor to the warehouse.
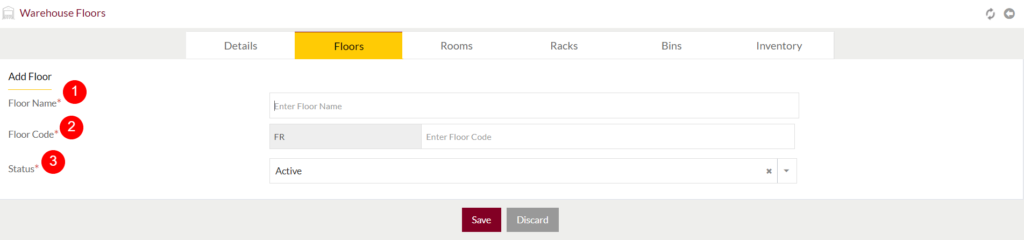
- Floor Name (Required): Specify the name of the floor.
- Floor Code (Required): Enter a unique code for the floor.
- Status (Required): Set the status for the floor.
- Same as the floors, the user will be able to view and add Rooms, Racks and Bins for the warehouse by clicking on the respective tabs.
- On clicking the Inventory tab, user will be navigated to the warehouse inventory page.
Mark the Warehouse Location Archive
- Admin will have the option to Archive the Warehouse from the list.
- Admin needs to select the warehouse from the listing for Archiving the warehouse.
View the Archived Warehouse
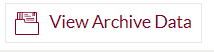
- On clicking the View Archive Data button, Admin will able to view all the archived warehouses.
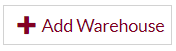
Add New Warehouse: To add a new warehouse, click on the below button
Add/Edit Warehouse
- User will be able to Add/Update the warehouse from this page
- The user needs to fill the warehouse information to add/edit the warehouse in the system.
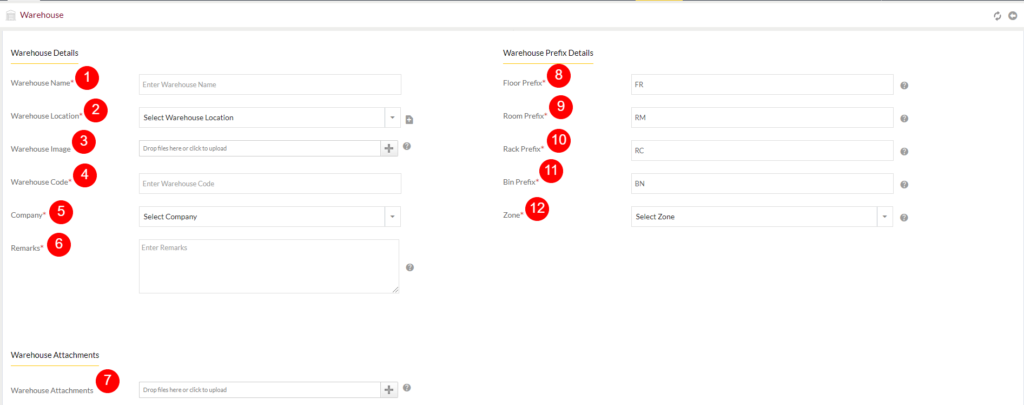
- Warehouse Name (Required): Specify the name of the warehouse.
- Warehouse Location (Required): Select the location for the warehouse from the drop-down. For example, if the location is selected as “Abuja”, then the warehouse will belong to the Abuja state.
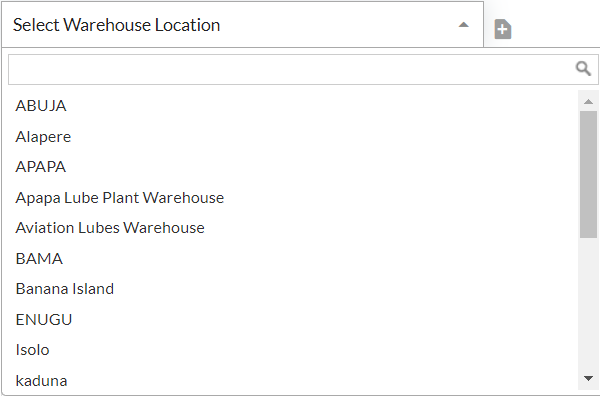
- If admin wants to add a new location for the warehouse, by clicking on the provided “+” option add location pop-up will be displayed. By specifying the details, the admin will be able to add a new location for the warehouse.
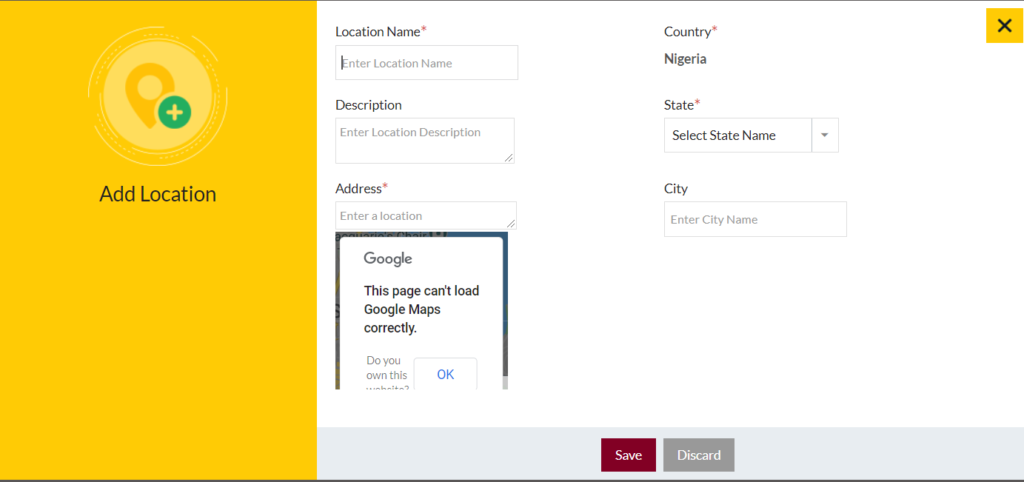
3. Warehouse Image : Upload the image for the warehouse location.
4. Warehouse Code (Required): Specify the unique code for the warehouse.
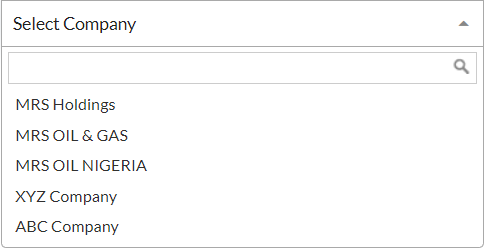
5. Company (Required): Select the company name from the drop-down for storing their products in the warehouse. For example, if the company is selected as MRS OIL & GAS, then the particular company will be able to store their products on the warehouse.
6. Remarks: This is for specifying the Remarks for the warehouse if any.
7. Warehouse Attachments: This is for specifying the attachments if any. For example, any files or images related to the warehouse.
8. Floor Prefix: This is for specifying the floor prefix. For example, the prefix for Floor is specified as FR.
9. Room Prefix: This is for specifying Room prefix. For example, the prefix for the Room is specified as RM.
10. Rack Prefix: This is for specifying the Rack prefix. For example, the prefix for the Rack is specified as RC.
11. Bin Prefix: This is for specifying the Bin prefix. For example, the prefix for the Bin is specified as BN.
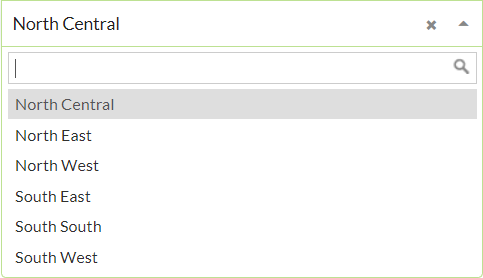
12. Zone: This is for specifying the warehouse Zone. Choose the required Zone from the drop-down. For example, if the zone is selected as “North East”, then warehouse will belongs to the north east zone.
- Admin can save the Warehouse by submitting the form or can discard the Warehouse.
- On Submission, the Warehouse will be listed in the Warehouse listing page.