Stock In-Bound
Purpose
The main purpose of this module is to enable the administrator to view and manage the stock in-bound requests for the warehouses. By placing the stock in-bound request admin will be able to add the item stock to the warehouses.
Navigation Path
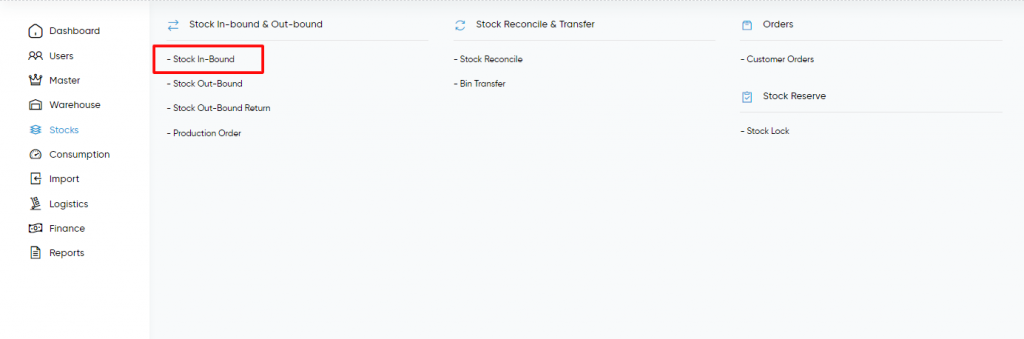
Path: Stocks> Stock In-Bound
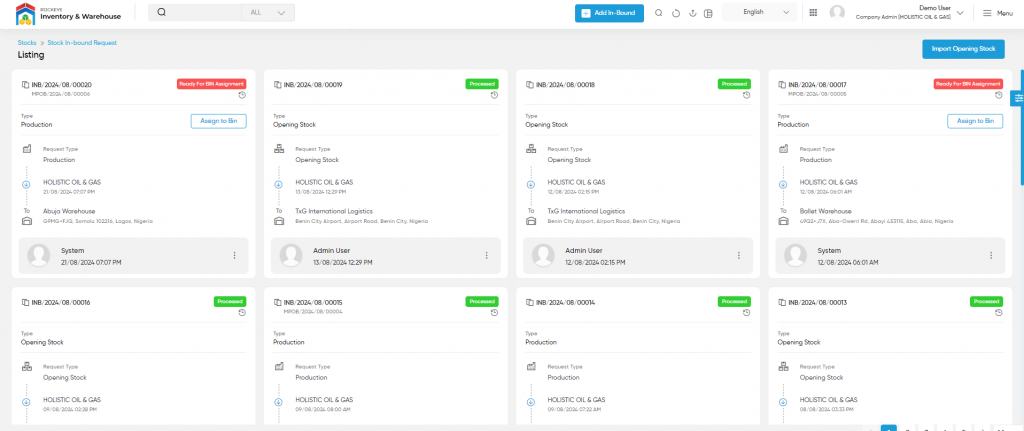
Listing Screen
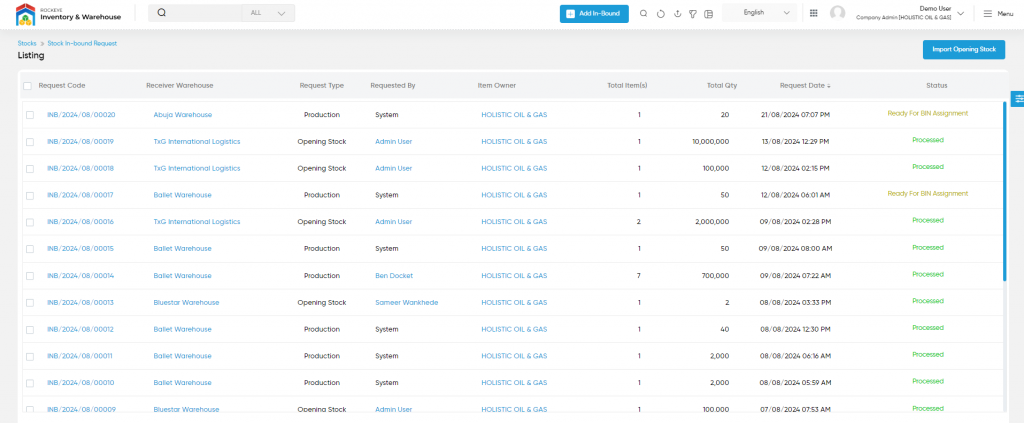
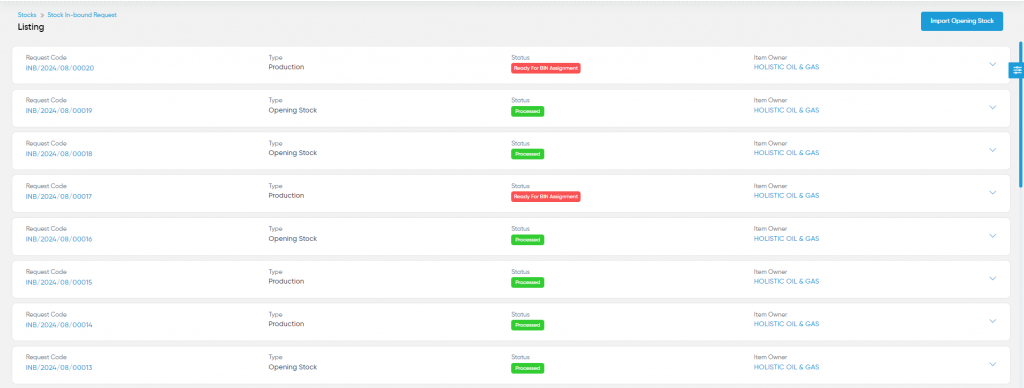
View list of all the stock in-bound requests that were previously added by the users. Admin will have an option to add the request and also will be able to assign the bins for the requested item stock. Admin will be able to view the status log of the requests. Admin will be able to search the requests using the filter option that is provided on the list. Admin can view the listing in three ways, the admin will have the option to change the view by clicking on “Change view” Button.
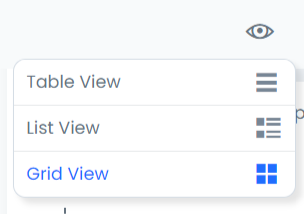
Table View
List View
Grid View
Import Opening Stock
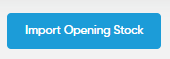
- By clicking on the Impot Opening Stock button available at the top of the page, user will be able to upload the item stock in bulk as follows
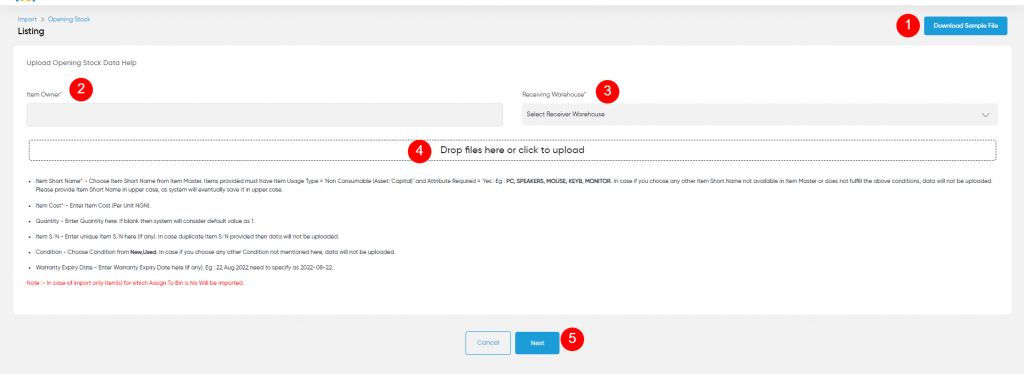
- Download Sample File: On click, user will be able to download an sample file for uploading the opening stock. User will be able to update the data in it.
- Item Owner: Select the item owner for in bounding the stock. For example, if the item comes under MRS Holdings then specify the owner as MRS Holdings.
- Receiving Warehouse: This is for specifying the name of the In-Bounded Stock Receiving Warehouse. Choose the warehouse name from the dropdown.
- Drop Files: Drag and drop the CSV file of the items opening stock data to upload in bulk.
- Next: On dropping the required file, and by clicking on the next button, user will be navigated to the import opening stock page, where user can import the file for bulk upload.
- Note: In case of import only item(s) for which Assign To Bin is No Will be imported.
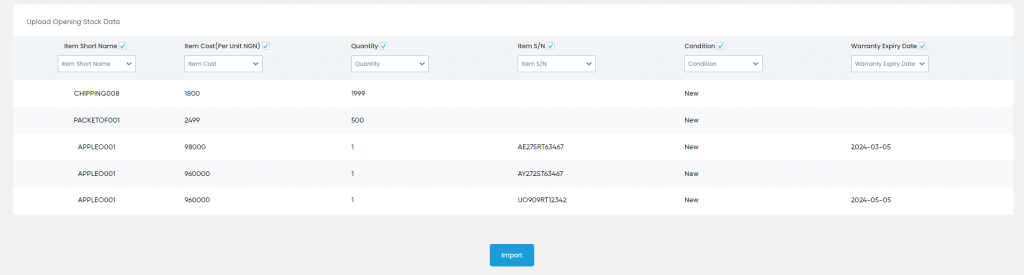
- Import: by clicking on the import option, if all data is valid the item stock will be imported successfully.
Add In-Bound: To add a new stock in-bound, click on the below button

Place Stock Inbound Request
- User will be able to place a stock in-bound request from this page
- The user needs to fill in the stock in-bound information to place the order.
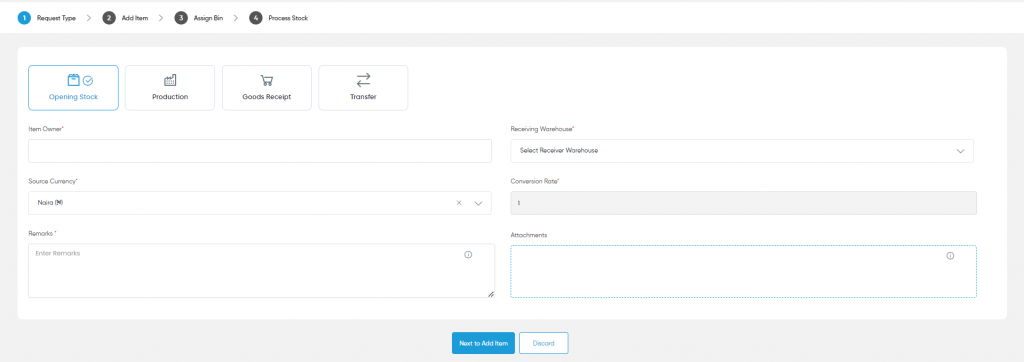
Fields available in the Stock in-bound requests form
1. Request Type (Required): This is for specifying the request type of the stock. There are 4 types of Stock Inbound requests which the user can perform.

Opening Stock: This is for placing the opening stock request for in-bounding the items.
Production: This is the stock inbound request, in which the stock is manufactured inside the warehouse.
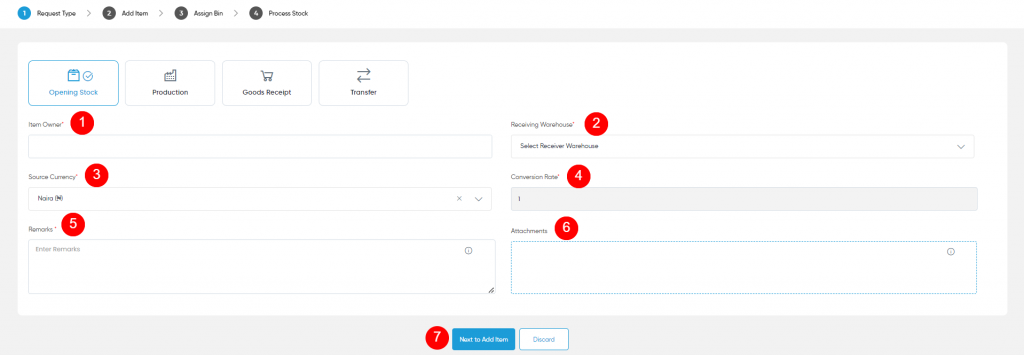

- Item Owner (Required): This is for specifying the Owner of the item. For example, if the item comes under MRS Holdings then specify the owner as MRS Holdings.
- Receiving Warehouse (Required): This is for specifying the name of the In-Bounded Stock Receiving Warehouse. Choose the warehouse name from the dropdown.
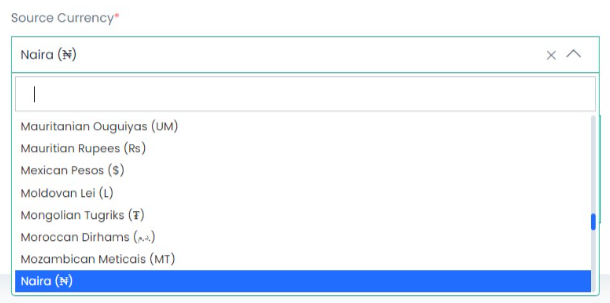
- Source Currency (Required): Select the source currency for the item. Based on the “Source Currency”, the user will be able to view the “Conversion Rate” and the “Item Cost”.
4. Conversion Rate (Required): Specifies the rate of conversion of foreign currencies against the selected source currency. For example, if the source currency is selected as Naira, then here the conversion rate for 1Naira will be displayed.
5. Remarks (Required): This is for specifying the Remarks of the In-Bounded Stock if any.
6. Attachments: This is for specifying the attachments if any. For example, any pdf files or images related to the In-Bounded Stock.
Good Receipt: This is the stock inbound request in which the warehouse inbounds an order based on the Purchase order.
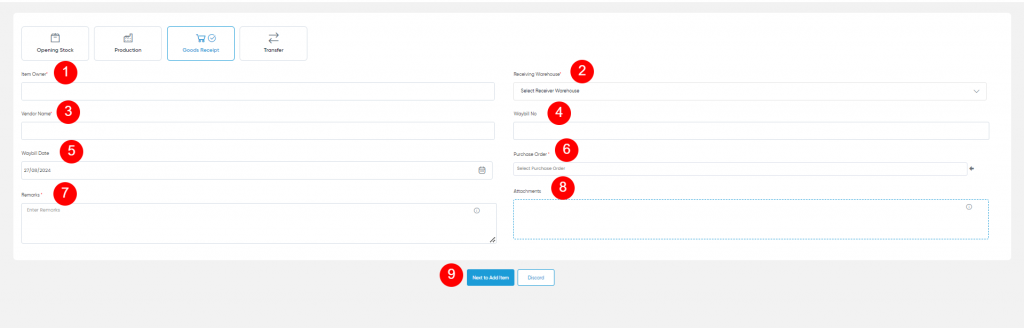
- If the user has selected Goods Receipt as their request type, then the user is required to specify a few extra fields such as
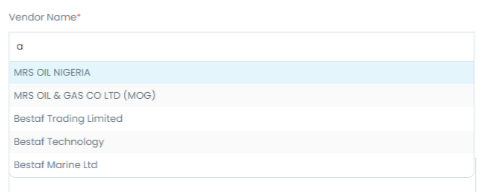
- Vendor Name(Required): The user needs to specify the name of the vendor. This field will only display the name of the vendors which are listed with the Item Owner selected by the user. The name of the vendors is taken from the procurement system.
- Waybill No: The user needs to specify the waybill number.
- Waybill date: The user needs to specify the Delivery Challan date.
- Purchase order(Required) – Based on the vendor selected, the user can select the purchase order from which they want the products to be inbound. The purchase orders are fetched from the procurement system.
Transfer: This is the stock inbound request in which the stock is transferred from one warehouse to another.
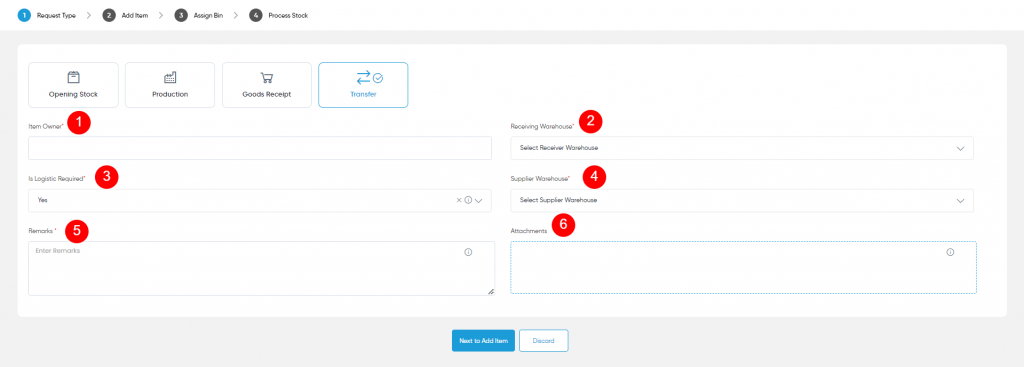
If the user has selected transfer as inbound request type the user is required to specify a few extra fields such
- Supplier Warehouse(Required): The user is required to select a warehouse from the drop-down of warehouses, from which the receiving warehouse requires the products.
- Is Logistics Required(Required): This selection allows the user to specify whether logistics is required for the transfer or not.
7. Next to Add Item: By clicking on the add item button, the admin will be able to specify the items for placing the stock in-bound order.

- If the Request type is “Production”, “Opening Stock” or “Goods Receipt” then the user is required to scan the barcode of the item. On scanning the barcode of the item the user will be able to select the batch corresponding to the item and enter the required quantity of the item.
- If the Request Type is considered as “Transfer” then the user will be able to specify the item name from the item drop-down list and the quantity of items required to be inbounded.
- Scan or Enter Item Barcode: Scan or enter the barcode of the item for which the user wants to place the inbound request. Once after scanning or entering the valid barcode of an item, the following data will be displayed

- Item: Specifies the name of the item.
- Batch Number (Required): Choose the batch number for the item.
- Item Cost (Per Unit MUR) (Required): Displayed the item cost (Per Unit MUR), user can update it as per his/her requirement.
- Item Cost (Per Unit NGN): Based on the specified item cost (Per Unit MUR), the item cost (Per Unit NGN) will be displayed here.
- Qty (Required): Specifies the quantity of the item that user wants to place the request for in-bound.
Assign to Bin
- By clicking on the Assign to Bin button available in the list view, the administrator can assign the item to the Bins available in the warehouse, below is the screen reference for assign to the bin.
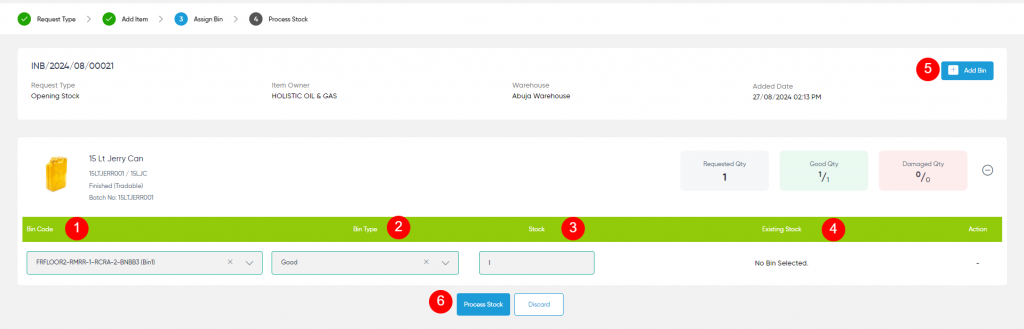
- Select Bin: Select the bin in the dropdown for storing the items in the warehouse. Depending on the requested quantity of In-bounded stock assign the Bins.
- Bin Type: After selecting the assigned Bin from the drop-down, the user is required to select the bin type(Note: Bin type will be visible only after a Bin has been selected from the drop-down). Good Bin is for items that are received in perfect state, whereas the Damaged bin is for items that have some type of damage in the whole process. Bins can be assigned for different Batches also, but the items that belong to those batches must be the same. The Bins related to the particular item will be displayed here along with the dropdown consisting of the information of empty Bins and Bins related to the item.
- Enter Stock: Enter the stock quantity (Note: the entered stock quantity should be equal to the ordered quantity.) Assign the total Requested Quantity into the required Bin. Once a bin has been selected for a particular item, it won’t be displayed again for the item allotment in the same transaction.
- Existing Stock: Represents the information related to the existing stock of the particular Bin will be displayed.
- Add Bin: If there is a need for adding a separate bin for the item allotment, that can be possible by clicking the “Add Bin” button.
- Process Stock: After selecting the bin and specifying the stock quantity, by clicking on the process stock button, the stock will be assigned to the bins in the warehouse. With a click of the Discard button, the user will be navigated to the stock inbound page, skipping the assign to bin process.
Reference Video Links
In-Bound_Request_Type_Transfer